
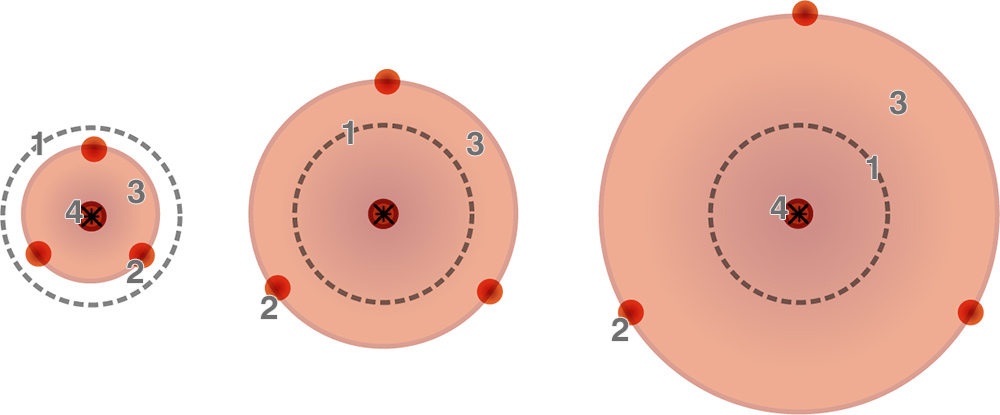
Effect of distance on group size. 1: (dotted line) vital zone; 2: (red dot) bullet; 3: (orange circle) group size; 4: point of aim. note how the group size (3) has increased from 4″ (on left) to 9″ at 300 yds (on right)
(above) the vertical axis represents inches while the horizontal axis show range in yards
Rifles & ammunition
In addition to understanding the technical capabilities of your rifle/ ammunition combination, to shoot with consistent accuracy over a range of distances and weather conditions requires knowledge and understanding of three key factors:
- 1. The effect of distance on group size;
- 2. The effect of distance on bullet path;
- 3. The effect of wind on bullet path.
The effect of distance on group size
The ability to group bullets tightly and consistently will be down to individual marksmanship.*
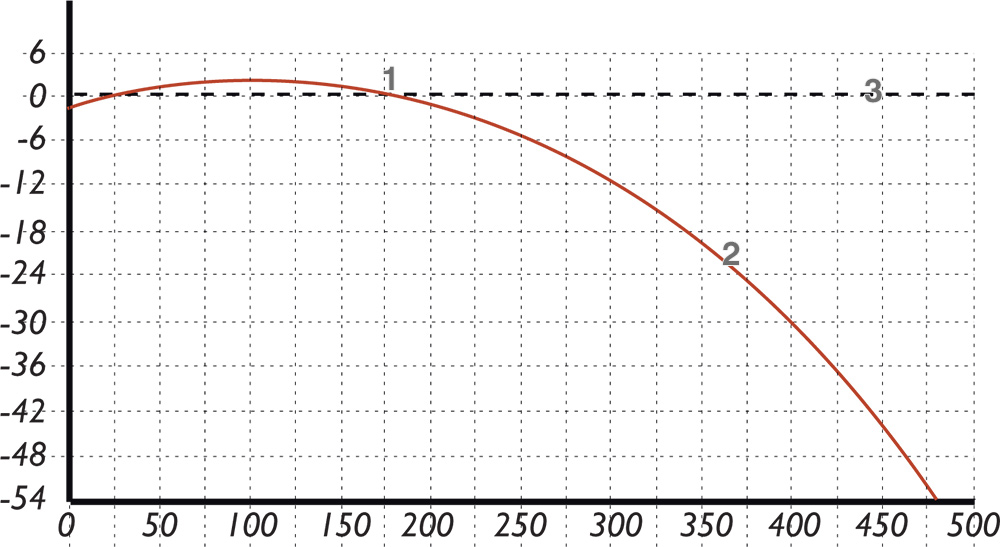
1: point of zero 2: bullet path example for a typical rifle/ammunition combination; 3: line of sight
It is important to note that group size increases proportionately over distance e.g. if your grouping is 3" at 100 yards, it will increase to 6" at 200 yards and 9" at 300 yards (Fig. 1). Your ability to produce a tight group is therefore critical to ensure that bullets will consistently fall within a 4” killing area.
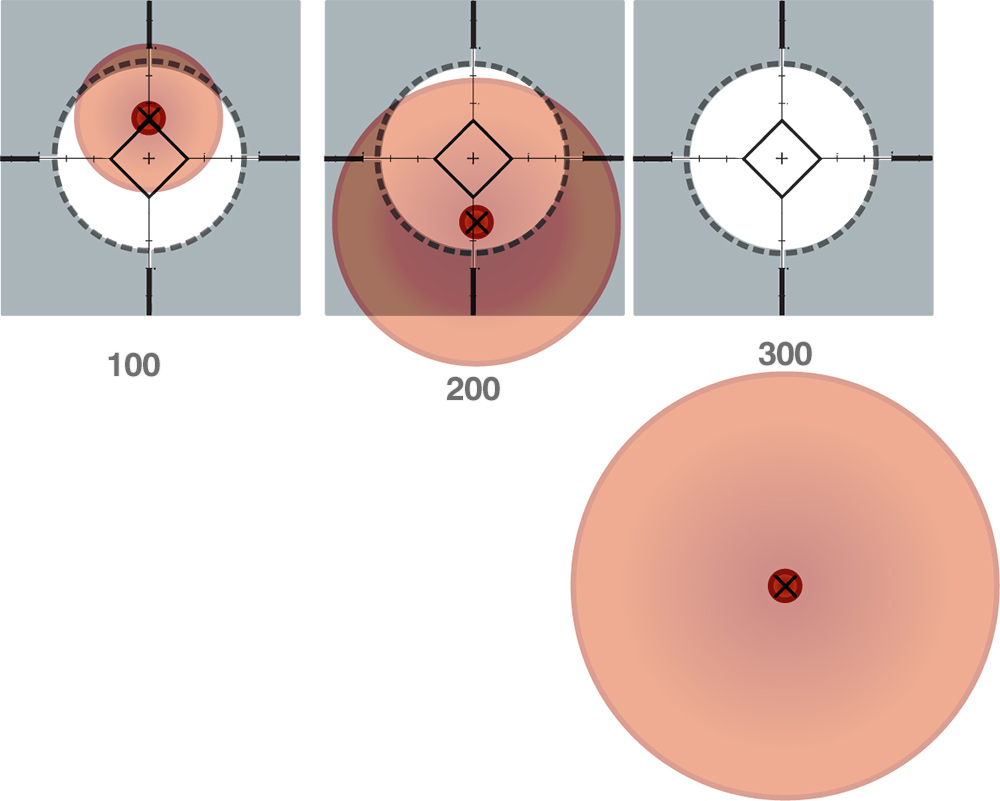
effect of distance on bullet path. (left) 100 yards (centre) 200 yards (right) 300 yards. above shows an example of a bullet path for a typical stalking rifle/ammunition combination. Note particularly how the bullet drop changes with respect to the line of sight and increases markedly beyond the zero distance.
The effect of distance on bullet path
While all bullet flights (trajectories) are curved, the exact path will depend mainly on the bullet weight, its speed and how efficiently it flies through the air. Bullet paths will therefore be different for different rifle/ ammunition combinations.
For each individual rifle/ammunition combination, the bullet path and the effect of bullet drop is predictable and can be calculated for given distances** see Fig. 2 and BPG Maintenance and Zeroing. Unlike group size which increases proportionally with distance, bullet drop does not. After approximately 200 yards the extent of bullet drop will increase with distance. Therefore, in a practical context, the ability to accurately estimate or measure distance (by use of a range-finder) is critical.
Setting up your rifle so that shots will fall within a 4” killing zone up to 200m without the need to adjust your point of aim*, will help to ensure that errors in estimating distance are minimised.
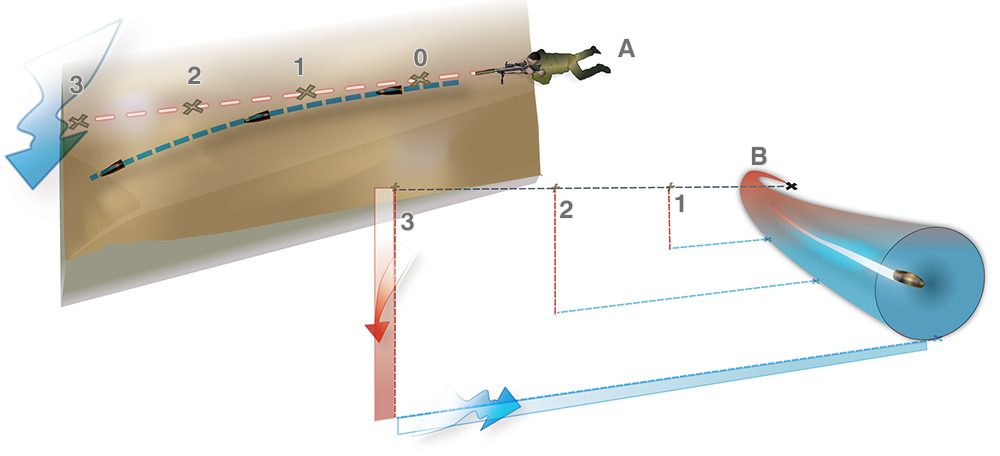
be aware of the effect of wind and that the effect varies over distance. 1, 2, 3 represent 100, 200, 300 yards respectively. In A note how the sight line is straight (0 being the firing point) whilst the bullet path is affected by wind (blue arrow). In B the x represents the firing point with the red arrow being bullet drop and the blue arrow representing wind deflection (the black dotted line being the sight line)
- Understand the basic information that describes bullet trajectory and what the drop of the bullet will be over various distances. This will ensure the appropriate zero range has been selected. Be aware that after approximately 200m, the effects of bullets drop and wind deflection will be such that bullets fall increasingly outwith a 4” killing zone over distance.
The effect of wind on bullet path
Whilst wind speed may be measured at a given point in time, the effect of wind on the flight path of a bullet is relatively difficult to predict. The extent or degree to which wind will push a bullet off course (wind deflection) will depend on wind strength, wind direction relative to the bullet path and the rifle/ammunition combination. The effect of wind is also inconsistent over distance. The degree of wind deflection will also depend on the distance the bullet travels. A relatively small degree of wind deflection to the bullet early in the flight path will be amplified the greater the distance the bullet travels.
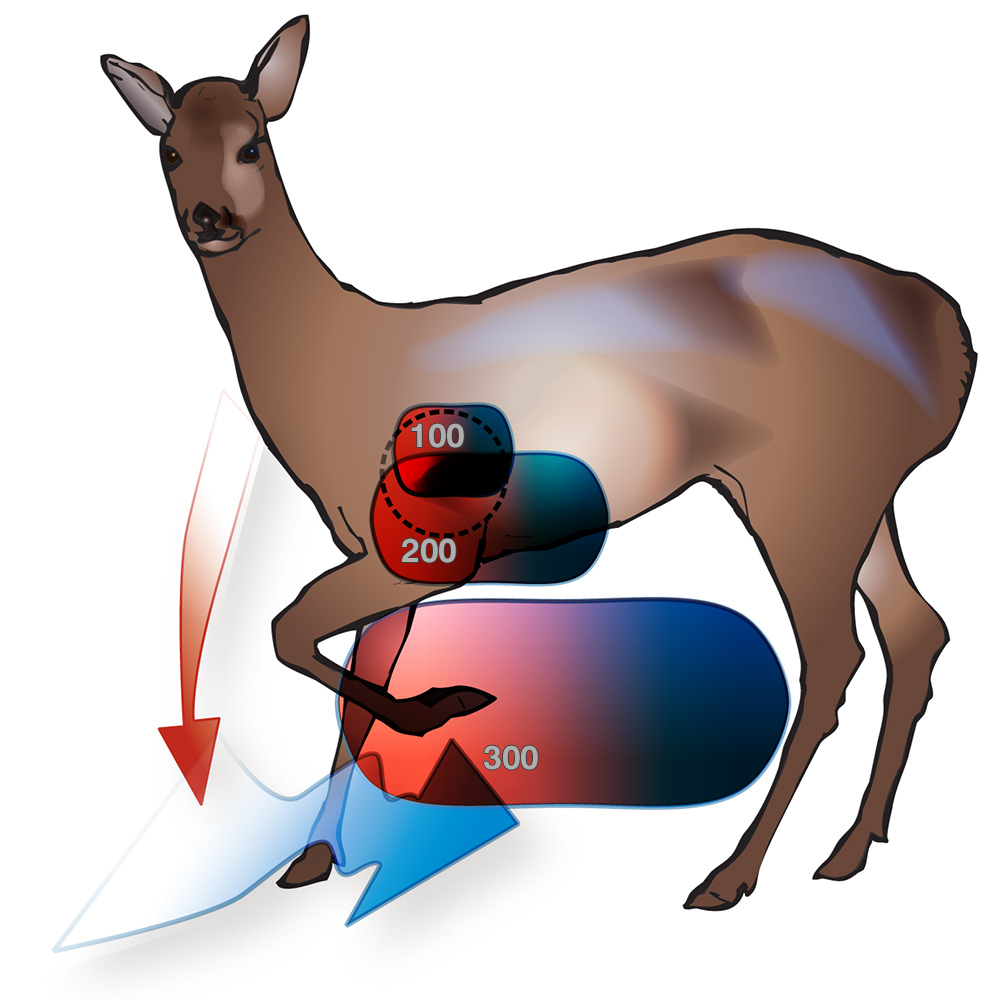
Putting it all together (above) the shaded areas represent the possible areas in which a bullet, aimed at the centre of the vital zone, could fall at different distances when the combined effects of group size and bullet path (red) and a moderate varying cross wind (blue) are taken into account
- Ensure that you understand as far as possible the effect of wind on the flight of your rifle/ammunition combination, in order to take the decision whether to shoot (see Fig. 3).
Putting it all together
Understanding how group size, bullet drop and wind deflection affect your particular rifle/ ammunition combination over distance is necessary for Best Practice and essential for shooting deer. Figure 4 shows how the 3 variables: group size, bullet drop and wind deflection come together when shooting deer at different distances.
- Ensure you recognise your own limitations when shooting live deer and keep within your capabilities.
- Prepare a ballistic table for your rifle/ ammunition combination.