Aim
The aim of this guide is to provide the practitioner with detailed examples of the various stages involved in the lardering process to enable efficient and simple carcass processing. The order in which the various stages are carried out will be a matter of preference, however, the outcome of the task should be to produce a carcass that is well presented and has been handled in such a way as to minimise the risk of contamination. The BP Guide Carcass inspection should be viewed as an essential accompaniment to this guide.
Planning
- Ensure there is capacity to hang the number of carcasses expected, and make alternative arrangements if necessary* .
- Notify game dealer at the earliest opportunity of the number of carcasses likely to be collected.
- Ensure that any waste produced can be disposed of in accordance with BPG Larder Hygiene and Waste Disposal.
Equipment
Ensure that the required equipment is ready for use prior to lardering. You will need some or all of the following:
Health and safety: Suitable protective clothing (e.g. apron, chain-mail glove, disposable gloves).| First aid kit.
Cutting: Sharp knife, with a fixed blade of no less than 4” or 10.16 cm and a non slip plastic handle. | Plastic scabbard. | Sharpening stone/steel. | Butchering saw.
Carcass handling: Scales of sufficient range to cover all species of deer culled | Bench/Table |Hoists/Pulleys | Stainless steel gambrels | Chest-spreaders | Stainless steel hooks.
Record-keeping: Trained hunter declarartion tag to be securely attached to carcass. An additional tag will be required if jaws are removed for ageing. | Record sheets.
Facilities
Larder
- Ensure that larder is of adequate size for the processing and storage of the maximum number of carcasses normally handled.
Inspection and recording
- When recording weight be clear and consistent in gathering and recording this data. Determine whether hill (gralloched, with head legs and pluck attached), or larder (gralloched, with head, legs and pluck removed) weight will be recorded.
- Inspect carcasses and follow procedures outlined in BP Guide Carcass Inspection.
- Label carcasses using tags to ensure traceability. Tags should ideally be attached into the flank as attaching it into the skin means that it may be accidentally removed further on in processing.
- Maintain records as per BP Guide Cull Records.
Carcass handling & processing
Pre-lardering
- Remove from vehicle.
- Weigh now if weighing for hill weight.
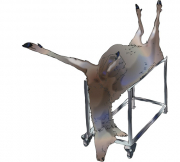
- Use hoists or winch to manoeuvre carcass onto bench.
Chest
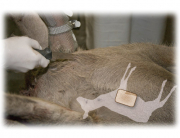
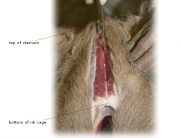
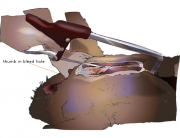
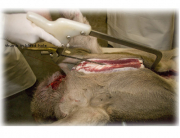
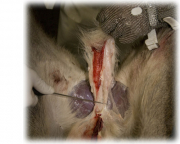
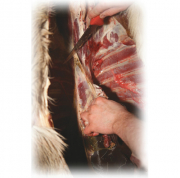
- Cut the skin along the sternum by inserting the knife with the sharp side of the blade facing upwards.
- Cut through the remaining flesh by repeating the stroke with the sharp side of the knife blade facing downwards. Take care to avoid hair coming in contact with exposed meat.
- Saw along cut on sternum from bottom to top. To find the centre line insert your thumb into the bleed hole.
- With knife cut open skin from top of sternum all the way up the neck (this may have already been partly done during gralloching)** .
Pelvis
When opening the pelvic area much of the exposed meat will enter the foodchain, contamination must therefore be minimised.
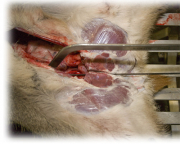
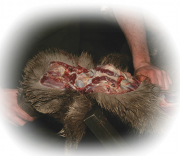
- Stag/Buck: Cut down to pelvic bone either side of the pizzle, using angled cuts as for hinds above and taking care not to cut the haunches. Saw through pelvis using two parallel cuts to isolate a small area of bone.
- Hind/Doe: Remove udder by cutting carefully around the udder using knife, take care not to burst the udder.
- Hind/Doe: Using a knife, cut round rectum and vagina at base of tail and free from the inside of the pelvis, gently pulling forward into the pelvic area. The whole anal passage, vagina and urinary tract can be removed on the bench or once the carcass is hanging up.
A single or double cut can be made to the the pelvis as with stags (see above) to aid this process, but is not necessary. - Either leave rectum intact and remove when carcass is hanging up or use knife to cut down and round rectum at base of tail and by cutting and pulling move forward into the pelvic area. The whole anal passage and urinary tract can then be removed once the carcass is hanging.
Legs
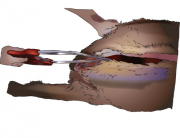
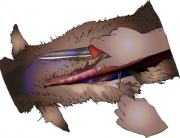
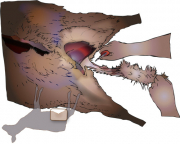
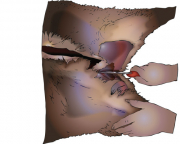
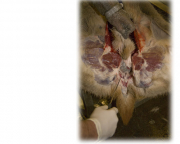
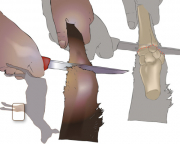
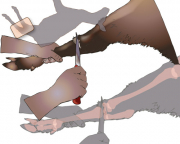
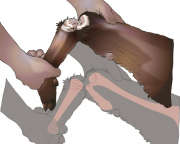
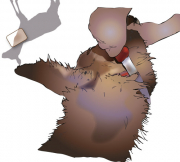
- Remove legs by cutting through joints with knife. There are several methods to locate where to make these cuts (see illustrations above and below). Essentially once the the joint has been located and the outer skin cut, the joint can be cracked open and a knife used to sever the remaining connective tissue.
Hanging Carcass
- Make slit in hocks of hind legs with knife, large enough to insert gambrel but avoiding severing the tendon and cutting into the meat
- Insert ends of gambrel in slits and hook gambrel to hoist/pulley. Hoist carcass onto rail.
Removing the pluck
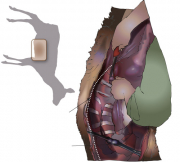
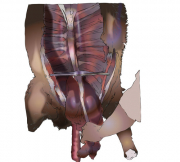
- Insert chest-spreader between breastbones. Cut away the diaphragm up to the saddle on either side, staying close to the rib cage and taking care not to cut into the meat.
- Pull out the kidneys.
- To remove the pluck, run the knife behind the pluck to cut the connective tissue close to the spine. Take care to avoid cutting the meat.
Cut through the aorta at the point it leaves the spine to connect to the heart. Pulling steadily downwards, pull the pluck down through the neck releasing the windpipe as you go and cut off the windpipe at the neck. - The recommended hygienic way to remove any contamination is trimming with a clean knife. Generally washing down the carcass should be avoided as it is not fully effective and will spread bacteria to other parts of the carcass. However where solid gut content is present inside the carcass, small quantities of low pressure water may be used before trimming. Any contamination that has been removed should be declared on the ‘Trained Hunter Declaration’.
Removing the head
- To remove head bend the head slightly back. Stick the knife into the neck behind the windpipe at a point below the ear and cut outwards to cut open the throat and to expose the joint between the skull and the atlas bone. Cut the tissue either side of this joint and pull or twist the chin back to dislocate the joint. Inspection of the lymphs node associated with the head could be carried out at this point. Cut through the remaining tissue to completely remove the head.
Butcher weight
- After the carcass has been lardered and dried, record butcher (larder) weight (i.e. gralloched, with head, legs and pluck removed)
Storage & security
- Ensure the temperature of carcasses stored reach 7oC or less within a reasonable time.
- Ensure carcasses are protected from vermin and flies.
- Lock facilities when they are left unattended and ensure the key is only accessible to authorised personnel.
Dressing a carcass in the field
In exceptional circumstances, it may be necessary to dress a carcass fully in the field, particularly in the case of smaller species. For reasons relating to food hygiene and food safety, this practice is not recommended, unless extra care is taken to minimise contamination risks.
- Ensure that where a carcass is dressed in situ, that every possible measure has been taken to prevent contamination to the carcass and that hygiene principles are adhered to.*
- When removing pluck, head and feet in field, ensure that a full health check is completed.**
- A carcass that has been field dressed must never be dragged.
The carcass should be extracted inside a thoroughly clean bag such as a roe sack. - Avoid cross contamination while being transported by vehicle. Do not heap carcass and use a covered, clean washable container.
- Ensure that all waste is disposed of in accordance with BPG Larder Hygiene & Waste Disposal.

